Imixs-Forms
Imixs-Forms is a lightweight JavaScript framework that helps you build workflow-enabled web applications in minutes. Define your forms directly in your BPMN model and let Imixs-Forms handle the rest.
Tutorial
In our Imixs-Forms Tutorial you can find a step by step guide how to get started with Imixs-Workflow in a fast and easy way. The tutorial explains different concepts about Imixs-Workflow in general and how to model your own workflow. You can skip the tutorial if you are already familiar with the basic concepts and continue with the section “Quick Start with Docker”.
Quick Start with Docker
Get started in less than 5 minutes:
1. Download the demo application:
$ git clone --depth=1 https://github.com/imixs/imixs-forms.git my-project
$ cd my-project && rm -rf .git
2. Start the Imixs-Workflow Service with Docker.
If not yet have Docker installed on your machine, see the official install guide.:
$ docker compose up
Note: The docker-compose.yaml file expects a data directory ./models/ providing the BPMN models to be automatically imported during startup. So just create a directory models/ together with your docker-compose file.
.
├── docker-compose.yaml
└── models/
    └── ticket-en-1.0.0.bpmn
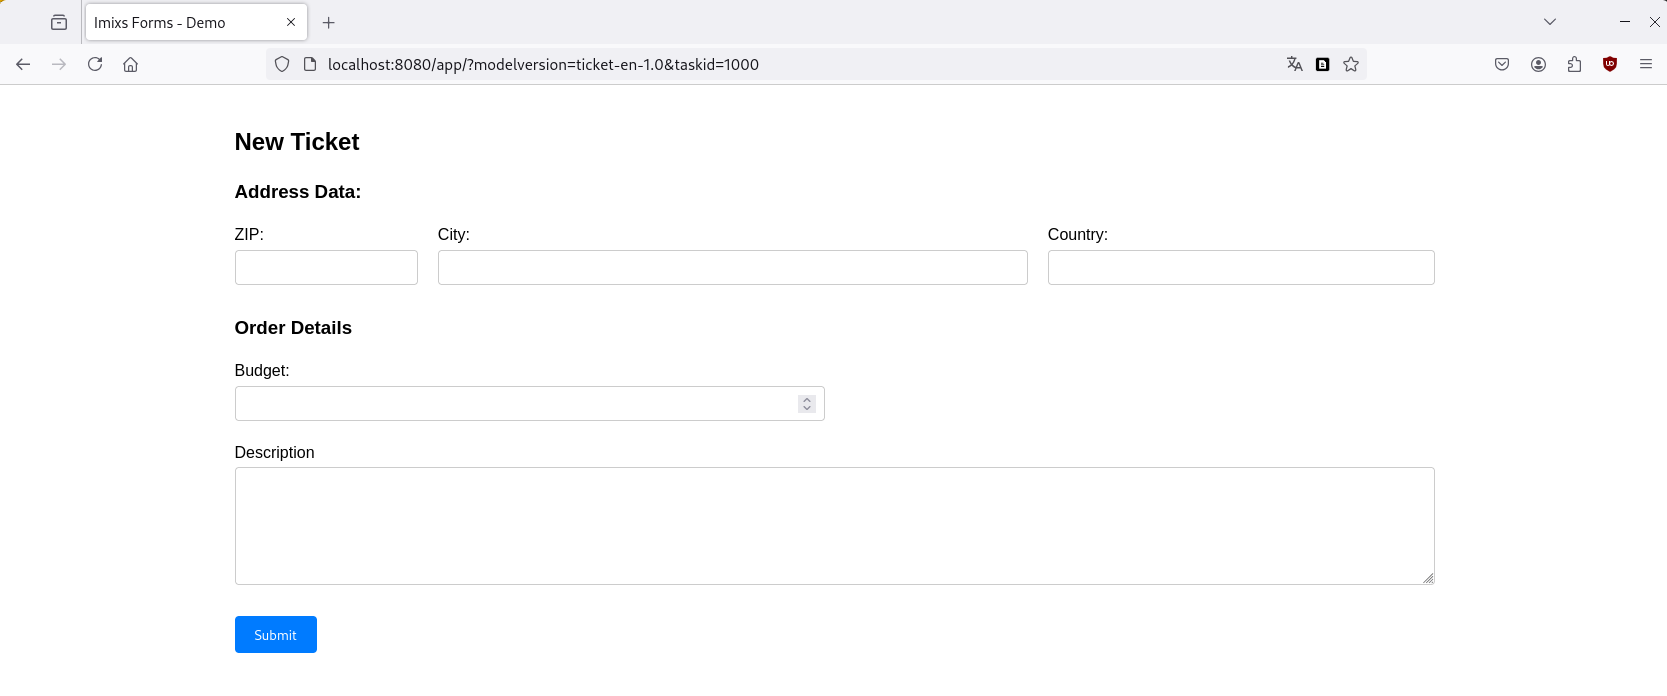
3. Open the demo application:
http://localhost:8080/app/?modelversion=ticket-en-1.0&taskid=1000
Create Your First Form
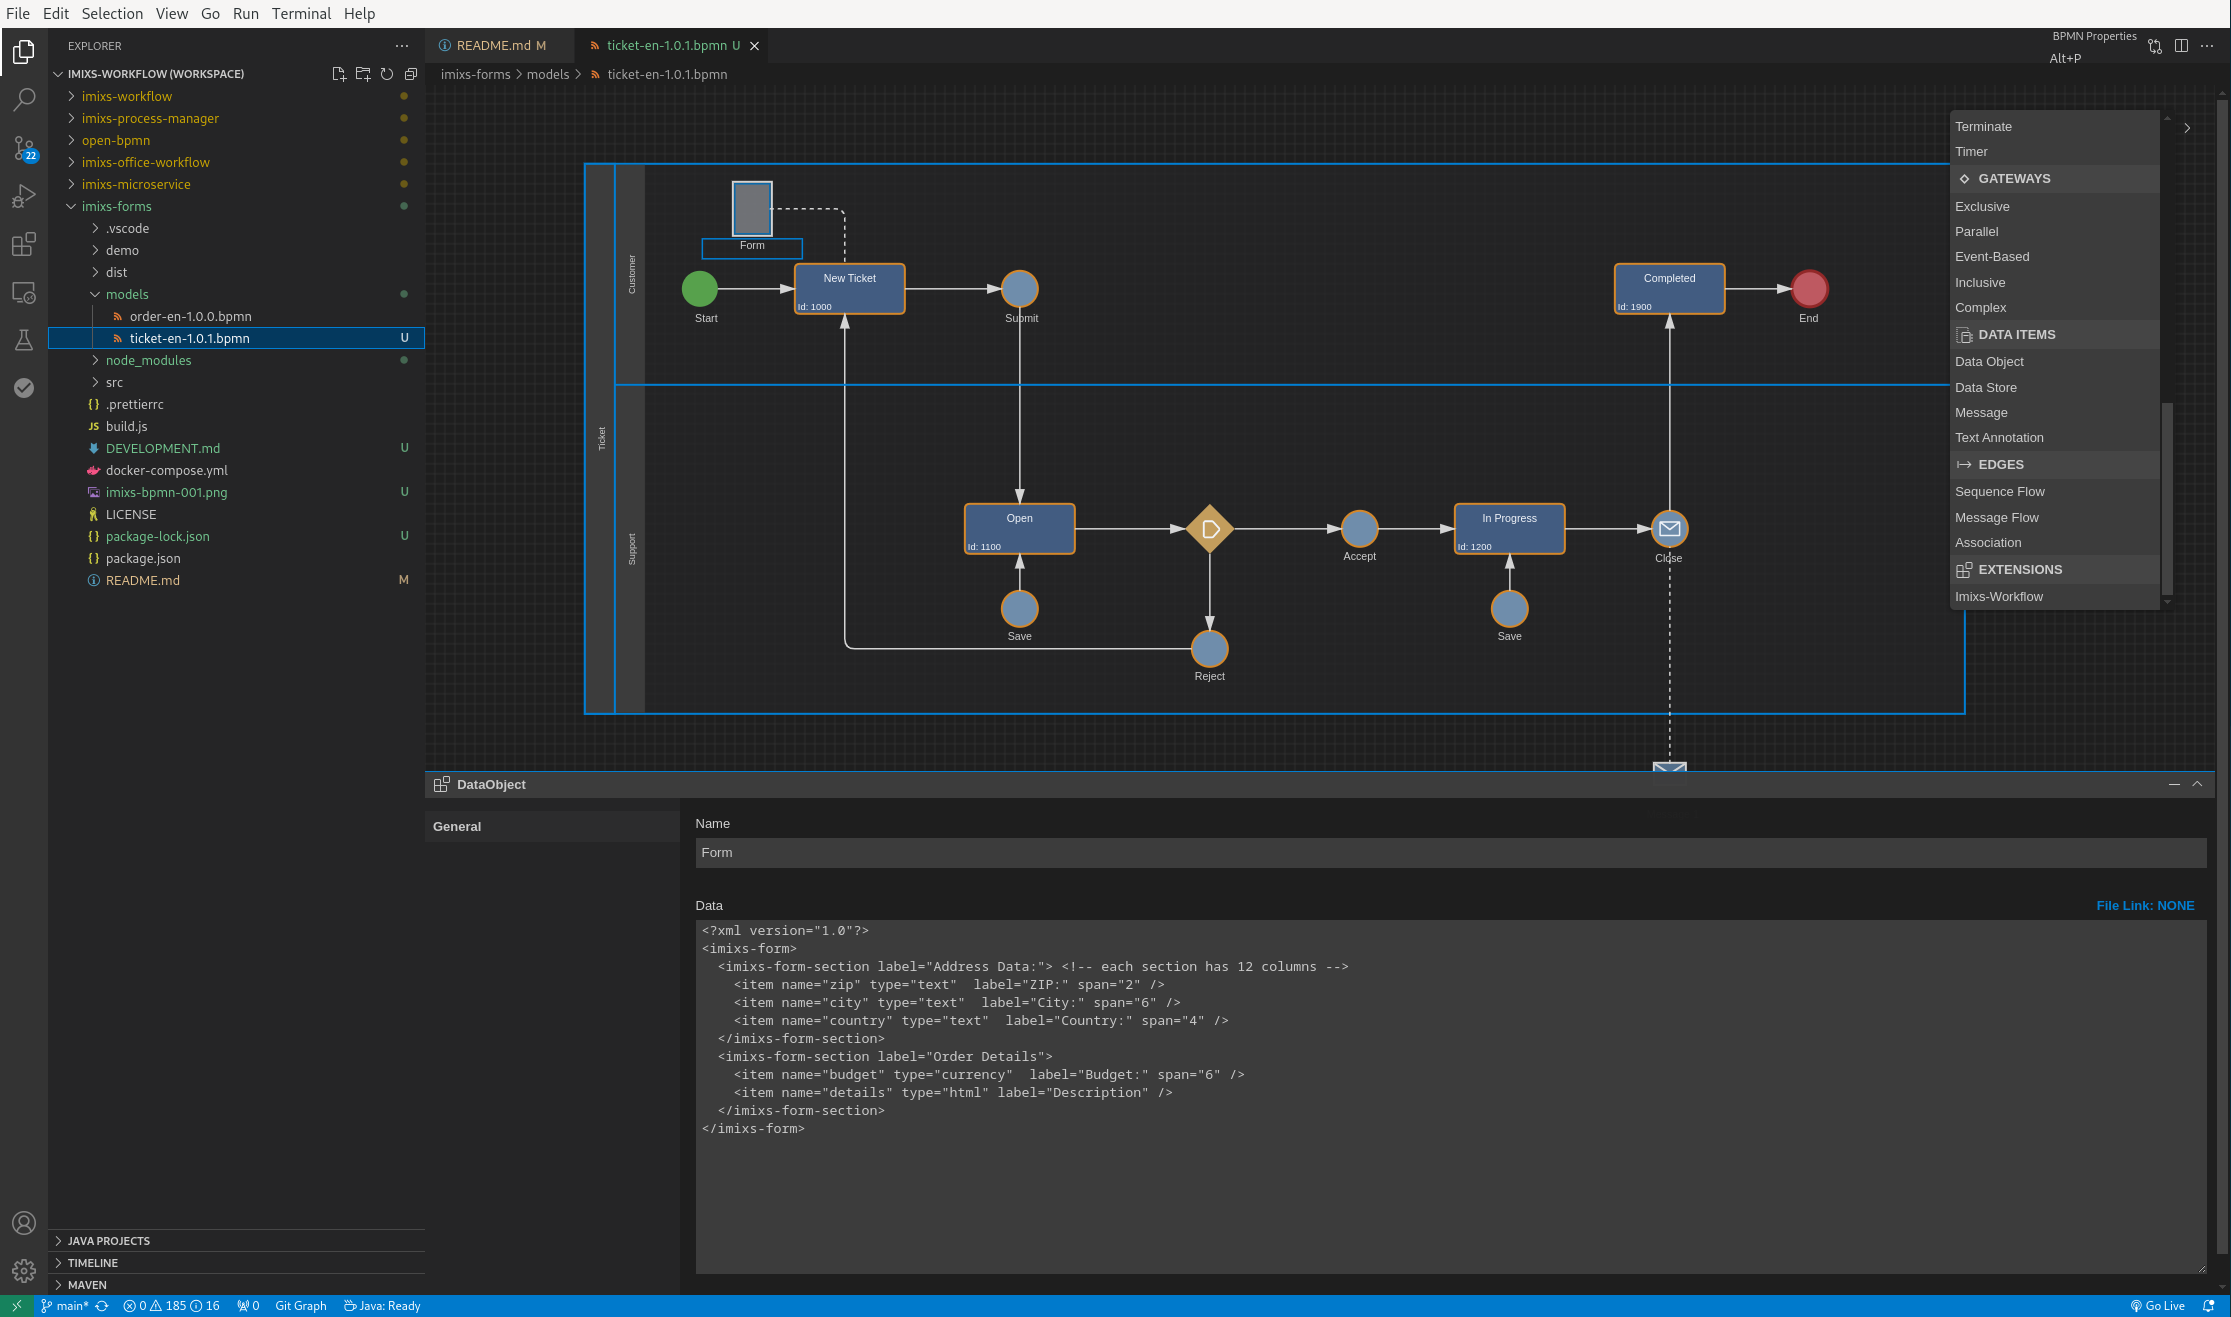
To create your own forms, you'll need the Open-BPMN VS Code extension:
- Install VS Code if you haven't already
- Open VS Code and install the ‘Open-BPMN’ extension from the marketplace
- Open the model file `ticket-en-1.0.0.bpmn' or create a new BPMN file and start modeling your workflow
If you restart the server, your models will be automatically updated.
Optional you can also upload your model using the curl command
curl --user admin:adminadmin --request POST -Tticket-en-1.0.0.bpmn http://localhost:8080/api/model/bpmn
Define Forms in BPMN
Each task in your BPMN model can have its own form definition. Find more about the Imixs Form Specification.
See Also
Documentation
Core Concepts
Building Applications
Operations
Project
Community
